
Easter Sewing Bee
Mrs Harryman has shared with us an Easter Sewing Bee project. Here is her step by step pictorial to help you make these little Easter treat bags at home. We'd love to see what you make. Please share your pictures with us.
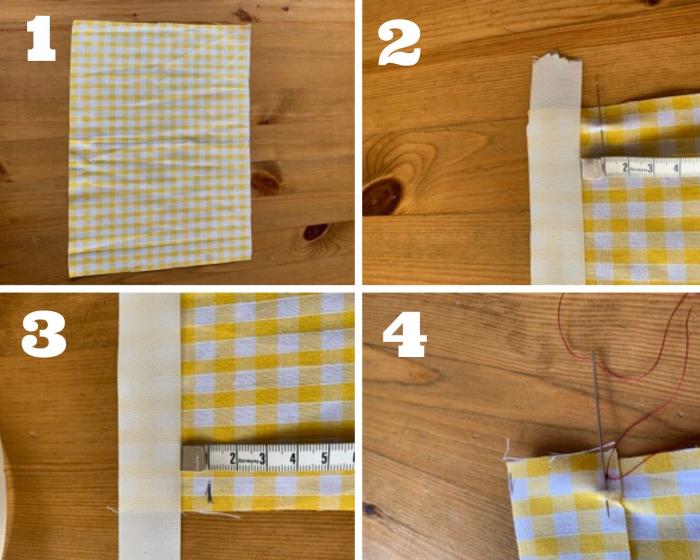
Step 1: Cut a rectangle out of fabric. This should measure 30cm x 22cm.
Step 2 & 3: Take a piece of ribbon 80cm long. Place this along the top 30cm edge of the rectangle. Using a pin or pencil mark 1cm below the ribbon. Fold the fabric over to match your markings. Ask an adult to help you iron the fold.
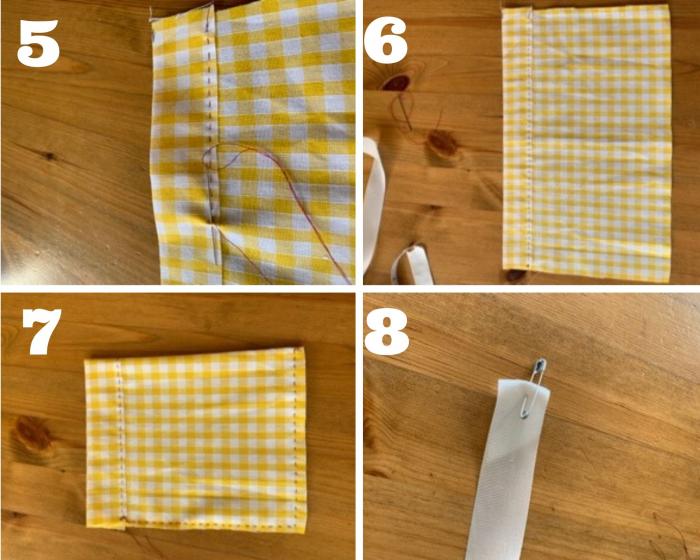
Step 4 to 6: Use running stitch to hold the fabric in place and make the casing for your ribbon. These stitches should be 5mm from the rough edge. I have used red thread so that you can see the stitches, but you should use a thread that matches the colour of your fabric.
Step 7: Fold your rectangle in half. Stitch down the side, starting where your previous stitches finished, and along the bottom edge.
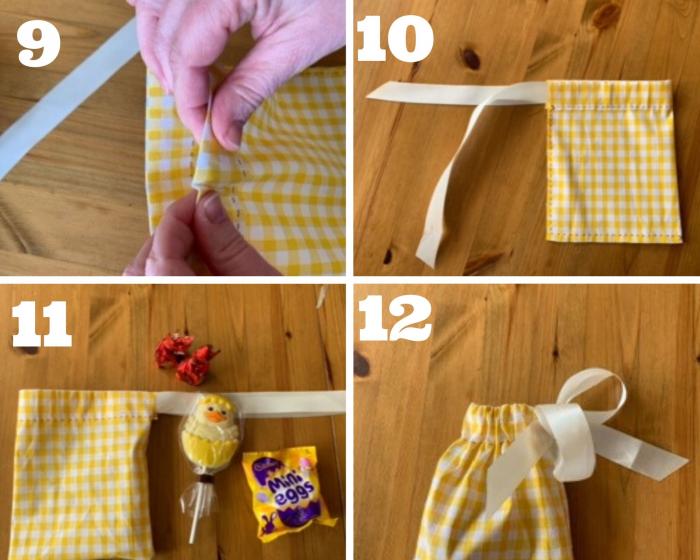
Step 8 to 10: Using a safety pin feed the ribbon through the casing at the top of the bag.
Step 11: Your bag is now inside out. Turn it the right way round so that all the rough edges of the fabric are on the inside.
Step 12: Fill with chocolate treats and tie the ribbon in a bow. Now hide it away until Easter Sunday!